
- It's good to have a galaxy to play with, 'cause we're gonna need a lotta space for all this hardware:
- 5.1” Super AMOLED display (1920 x 1080, 432 ppi)
- 16 MP rear-facing camera with 4K video at 30 fps; 2 MP front-facing camera with 1080p video and wide-angle lens
- Sensors for fingerprint, heart rate, gestures
- 2.5 GHz quad-core Snapdragon 801 processor, 2 GB LPDDR3 RAM
- 16/32 GB internal memory, plus microSD up to 128 GB
- LTE, NFC, Bluetooth 4.0 BLE, Micro-USB 3.0, 802.11/ac MIMO Wi-Fi

![Image 2/3: From fingerprint scans to interpretive gestures, this phone shows signs of high-level interaction with an advanced civilization. Also, [http://bitsandpieces.us/wp-content/uploads/2010/07/imagesdimples_small.jpg|dimples|new_window=true].](https://d3nevzfk7ii3be.cloudfront.net/igi/YGMNWuTIGtNUfOP2.medium)

- Our initial sensor sweep reveals no life signs—just lots of life-sensing equipment.
- From fingerprint scans to interpretive gestures, this phone shows signs of high-level interaction with an advanced civilization. Also, dimples.
-
- Port ho! This silver bay is a Micro-B USB 3.0.
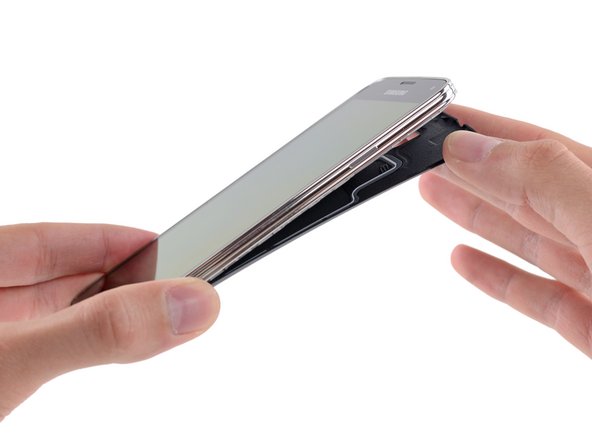
- And it's open. Down to the battery at least. Tears of joy fall silently around the teardown table.
- Peeling the back off this phone is easier than peeling a banana; the only tool required is an opposable thumb.
- Despite negative reviews of the case design, the ease of removal is a big plus for us.
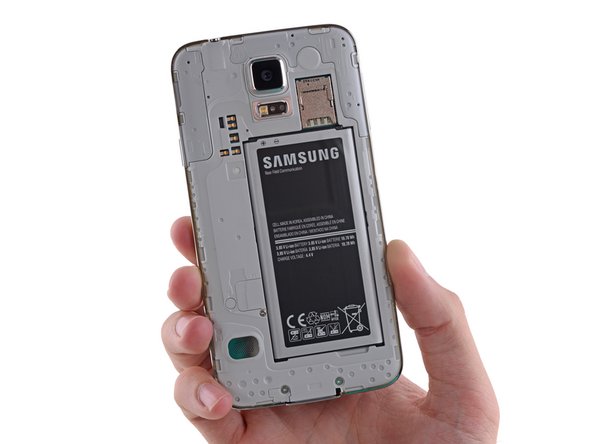
- What's that, no battery?
-
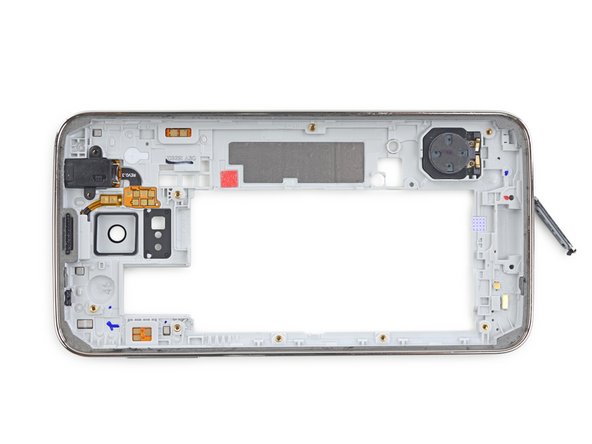
- No need to hitchhike to the edge of this galaxy to find the back case; it's free and clear.
- We're guessing that this strange shape in the case is not a remnant of space creatures, but a rubber gasket. Samsung chose the minimalist's approach to water and dust resistance overmore problematic methods.
-
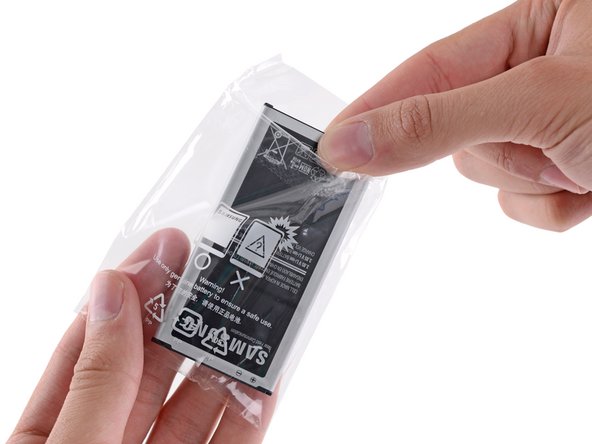
- We briefly glance at the warnings as we pull the battery out of its fancy packaging.
- This is a batty 3.85 V, 10.78 Wh battery. Samsung touted a better battery-saving mode, but failed to specify the life of this guy in its advertising—listing the battery spec as 2800 mAh.
- This is a slight upgrade from the S4's 3.8 V and 2600 mAh (9.88 Wh) battery. Advertised at 7 hours of talk time, and up to 12.5 days of standby.
- We install the new battery. Then, we take it back out. This teardown has places to be and they're under that battery pack.
- For those keeping track at home, that took a grand total of 10 seconds. Beat that, HTC.
-
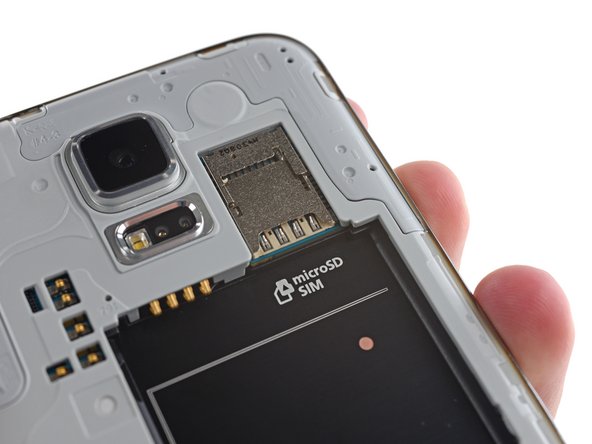
- Samsung has stacked the deck in our favor—the deck of microSD + SIM cards, that is.
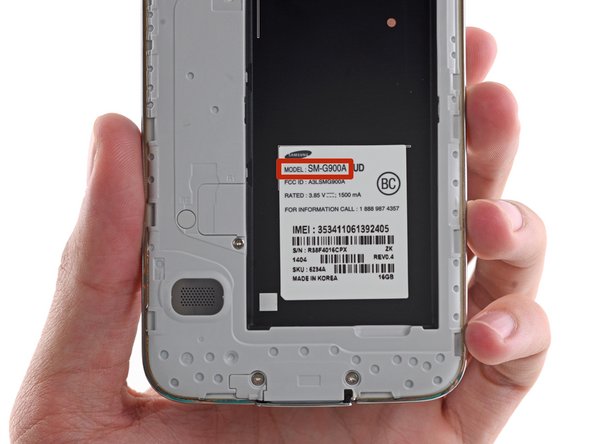
- "Galaxy S5" may be catchier, but for those who prefer a more formal designation, SM-G900Ais the model number you seek.
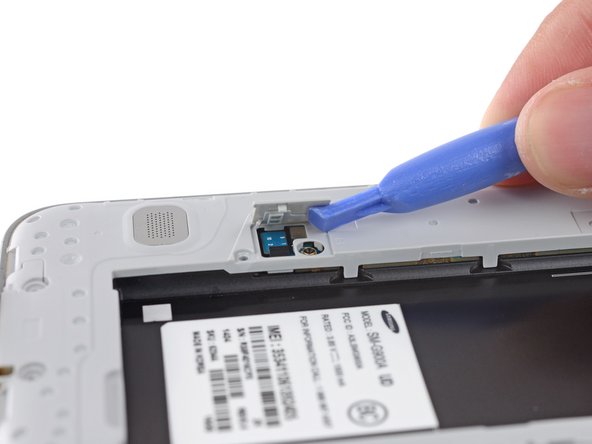
- What's behind door number R1?
- So far as we can tell now, just random connectors, and certainly not the screws we were hoping for. Stay tuned, because we've got a feeling this will be important...
-
- Suddenly, things are looking grim. The S5's forefather, the S4, took to the teardown table like a protocol droid to an oil bath.
- This time though, it seems the entire display assembly stands in the way of any further tinkering.
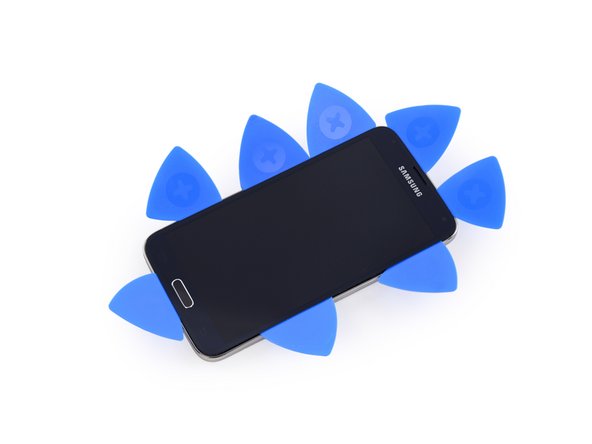
- With no other recourse, we call in our fixer muscle, iOpener and Opening Pick—perhaps better known by their street names, Heat and Force.
- This is looking dire. What happened, Samsung? I thought we were friends.
- Have you been hanging out with the Kindle Fire HDX?
-
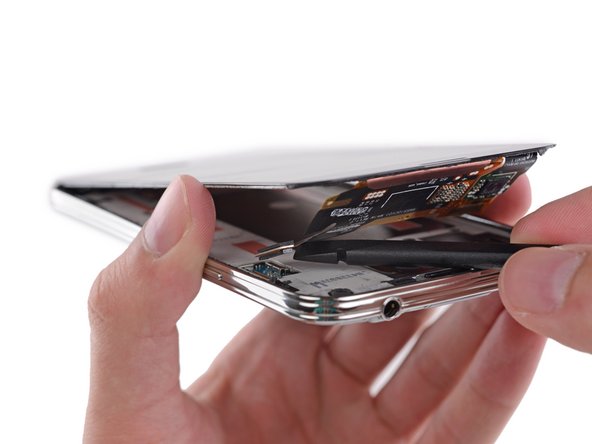
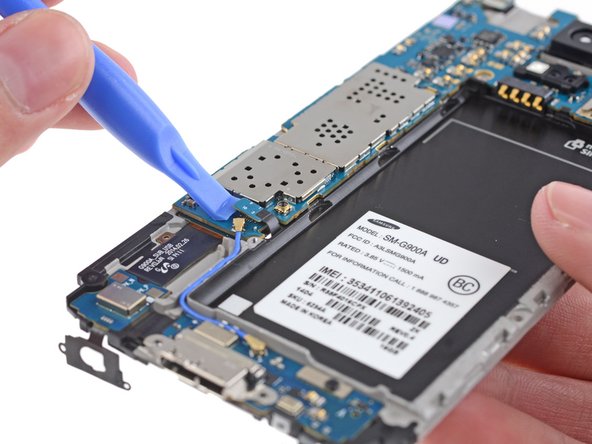
- Time for the final pry op—
- ...aw, nuts. CABLE.
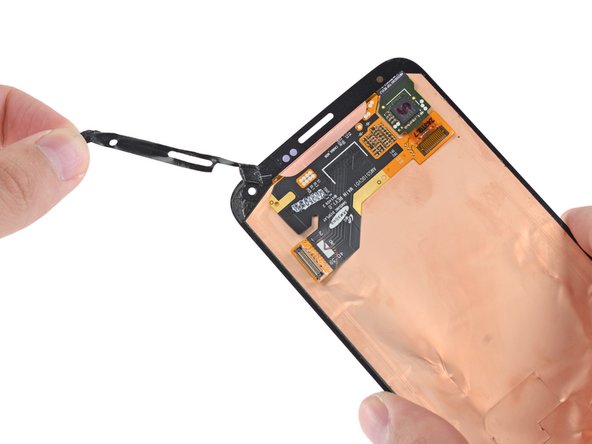
- After spudging past the cable, we begin to free the display assembly. Unfortunately, Samsung seems to think that the only way to get into this phone should be glass-first.
-
- With the display thusly removed, we just have to convince it to part with its home button. We let our plastic opening tool do the talking.
- Say goodbye to the sticky adhesive tape holding the screen down. Reinstalling your display will most likely require a fresh set of adhesive.
- This little display assembly cable has a lot of bits to ferry. It's helped out by a Synaptics S5100A touchscreen controller.
-
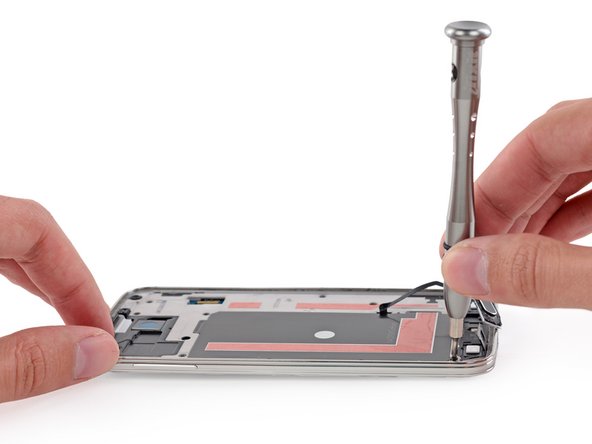
- Oh Samsung, we were hoping we might be going about this all wrong. But alas, here are the screws we needed—on the other side of the phone. Sigh.
- We've reached a point of debate on Galaxy nomenclature. The consensus says we're removing the midframe from the um, midframe.
- Confused? Yeah. We were, too.
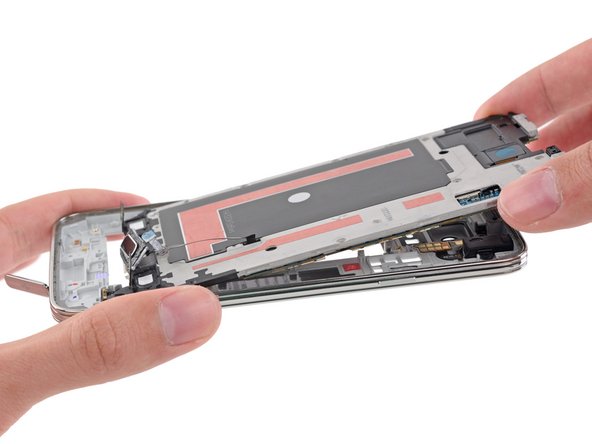
- Here's the deal: after peeling off the rear case, you encounter a midframe. And between that (first) midframe and the display assembly, there's this secondmidframe. So there you have it: double the midframe.
-
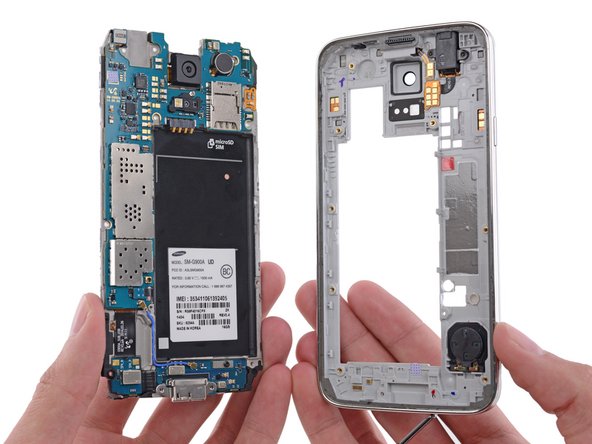
- So, to recap:
- On the left we've got the interior midframe, with the motherboard and daughterboard
- On the right we've got the exterior midframe, with a plethora of spring-contacted components
- We're already on a first-name basis with the other bits in here: headphone jack, speaker, buttons, etc.
- Identity crisis averted. Repairability crisis, TBD...
-
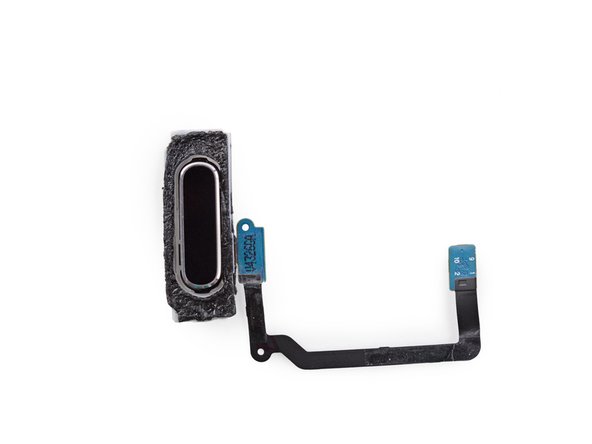
- Remember door number one's mystery connector? Surprise—it was the home button cable!
- Present and accounted for is the expected fingerprint scanner tech. The control chip is labeled 1200P E43F2.
-
- Near the center of the Galaxy we find
a black holethe motherboard. With the hard work done, we pop it out and start scouring for evidence of intelligence. - Our first sign comes via the camera.
- Anxious for a staring contest, we use our trusty plastic opening tool to pry it out for a better look.
-
- On the left, we have Samsung's 16MP 1/2.6” rear-facing camera.
- Safe and sound in the main cam's backpack is a control chip: QDA41 L1010 R412.
- Standing next to the main camera is the Hobbit selfie stunt-double, a 2.0 MP front-facing camera.
- This little
wide-eyedwide-angle lens shoots with a resolution of 1920 x 1080. -
- Some galaxies have stars. Others have chips:
- Elpida FA164A2PM - The same 2 GB RAM package we found in the HTC One (M8), and different from the 2 GB Samsung chip found in Chipworks' analysis. Quad-core 2.5 GHz CPU likely layered beneath
- Samsung KLMAG2GEAC-B0 16 GB on-board memory
- Avago ACPM-7617 multi-mode, multi-band RF front end
- Murata KM4220004 (likely Wi-Fi module)
- 1412 (C1N75R UMR3) (C1N78B YMP4)
- Maxim Integrated MAX77804K (System PSoC) and MAX77826
- STMicroelectronics 32A M410
-
- SWEP GRG28 antenna switch module (thanksChipworks)
- Qualcomm WTR1625L RF transceiver (another encore from the HTC One M8) and...
- Qualcomm WFR1620 receive-only companion chip
- Qualcomm PMC8974 power management IC
- Lattice iCE40 LP1K low-power FPGA
- Invensense MP65M (MPU-6500M) gyroscope/accelerometer
- Qualcomm WCD9320 audio codec
- SIMG 8240B0 mobile HD-link transmitter and NXP 47803 NFC controller
-
- With the motherboard out of the way, we find ourselves short of parts. All we have left is a lonely little daughter board.
- Home to the charging port, a closer examination of this daughter board reveals cables for the bottom buttons, as well as a smattering of ICs:
- Cypress CY8C20075-24LKXI CapSense capacitive touch-sensing controller
- RFMD RF1119 antenna controller
- S1221 primary microphone

-
- Samsung Galaxy S5 Repairability Score: 5 out of 10 (10 is easiest to repair).
- The battery is incredibly easy to remove and replace.
- The display is now one of the first components out, making replacements a little faster. However, it is held in with a significant amount of adhesive and requires very careful and persistent prying and a considerable amount of heat to remove without cracking the glass or cutting cables.
- Once you get the device open, several components are modular and fairly easy to replace, such as the cameras, headphone jack, vibrator motor, and speakers.
- Replacing anything other than the battery requires first removing the display, risking extra damage on the way to a repair.
![Image 1/3: Port ho! This [http://en.wikipedia.org/wiki/List_of_ports_in_the_United_States|silver bay] is a [http://en.wikipedia.org/wiki/USB#Cable_plugs_.28USB_3.0.29|Micro-B USB 3.0].](https://d3nevzfk7ii3be.cloudfront.net/igi/govXaBEDSSVMA6U4.medium)
![Image 3/3: Peeling the back off this phone is easier than peeling a [guide|811|banana]; the only tool required is an opposable thumb.](https://d3nevzfk7ii3be.cloudfront.net/igi/s6aNjxY6bLioLHLI.medium)
![Image 1/1: No need to [http://top-science-fiction-novels.com/wp-content/uploads/2010/09/dontpanic_1024.jpeg|hitchhike] to the edge of this galaxy to find the back case; it's free and clear.](https://d3nevzfk7ii3be.cloudfront.net/igi/jEnPlcqRbMiBZRPI.medium)
![Image 3/3: This is a batty 3.85 V, 10.78 Wh battery. Samsung touted a better battery-saving mode, but failed to specify the life of this guy in [http://www.samsung.com/global/microsite/galaxys5/specs.html|its advertising|new_window=true]—listing the battery spec as 2800 mAh.](https://d3nevzfk7ii3be.cloudfront.net/igi/QXhLFBgPkPKq5SL6.medium)
![Image 1/2: Suddenly, things are looking grim. The S5's forefather, the [guide|13947|S4|new_window=true], took to the teardown table like a protocol droid to an oil bath.](https://d3nevzfk7ii3be.cloudfront.net/igi/L6ZFpmOZd5uGRdTc.medium)

![Image 3/3: Cable booby traps are like finding a [https://www.youtube.com/watch?v=ClwIj3x24Q4|pit of snakes|new_window=true] between you and the treasure you are after. To make matters worse, [https://www.youtube.com/watch?feature=player_detailpage&v=OuMQYFDAPyc#t=63|Harrison Ford|new_window=true] is nowhere to be found.](https://d3nevzfk7ii3be.cloudfront.net/igi/jcrFe5xtOSk31r2x.medium)


![Image 2/3: We've reached a point of debate on [http://en.wikipedia.org/wiki/Wikipedia:Naming_conventions_(astronomical_objects)#Galaxies|Galaxy nomenclature|new_window=true]. The consensus says we're removing the midframe from the um, midframe.](https://d3nevzfk7ii3be.cloudfront.net/igi/NKJW3JpFGjZItmSE.medium)


![Image 2/2: Touting new, faster auto-focus, this camera should enable users to finally catch [http://xkcd.com/1235/|a real UFO with photographic evidence.|new_window=true]](https://d3nevzfk7ii3be.cloudfront.net/igi/ZXie1pFUDwxAEtHN.medium)
![Image 1/1: Some galaxies have [http://ocremix.org/files/images/games/wii/1/super-mario-galaxy-wii-cover-front-56843.jpg|stars|new_window=true]. Others have chips:](https://d3nevzfk7ii3be.cloudfront.net/igi/6UCQakuqeh4tucMC.medium)
![Image 1/1: SWEP GRG28 antenna switch module (thanks [http://www.chipworks.com/en/technical-competitive-analysis/resources/blog/inside-the-samsung-galaxy-s5/|Chipworks|new_window=true])](https://d3nevzfk7ii3be.cloudfront.net/igi/OK2NgP5MgJNlMEuJ.medium)


