

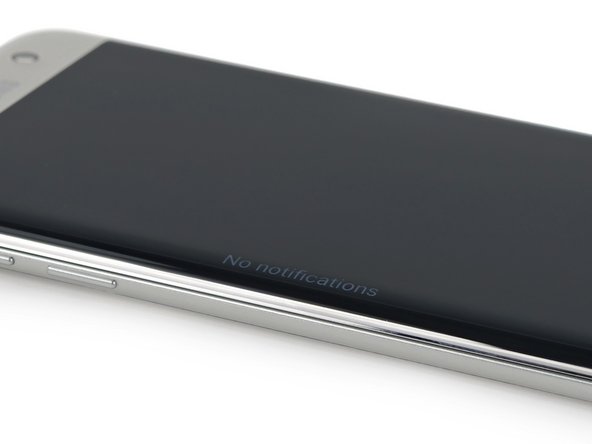
- We just had to test out our Edge notifications to show off that curvy OLED. Unfortunately,nobody has our new number.
- A quick comparison with last year's Galaxy S6 Edge shows that bigger is in. The S7 Edge also adds that same IP68 rating and expandable microSD slot that we saw in the S7, absent from last year's offerings.
- The camera bump is noticeably reduced as well, which may just be a result of the
rising sea levelextra 0.7 mm of thickness on the S7 Edge.
![Image 1/2: The procedure is identical to that of the standard S7: After liberal application of heat, our [https://www.ifixit.com/Store/Parts/iSclack/IF145-243-1|iSclack] and pick combo is super effective despite some extremely stubborn adhesive.](https://d3nevzfk7ii3be.cloudfront.net/igi/HoEKSAiEBSBa5nXx.medium)
![Image 2/2: Do you remember the days when an easily cracked back panel was at least [https://www.ifixit.com/Guide/iPhone+4+Rear+Panel+Replacement/3140|easily replaced]? iFixit remembers.](https://d3nevzfk7ii3be.cloudfront.net/igi/S1XQU2JZHyxxnEnW.medium)
- Here again, we have the continuing voyages of the
NSEA ProtectoriOpener, heating up a galaxy near you. - The procedure is identical to that of the standard S7: After liberal application of heat, our iSclack and pick combo is super effective despite some extremely stubborn adhesive.
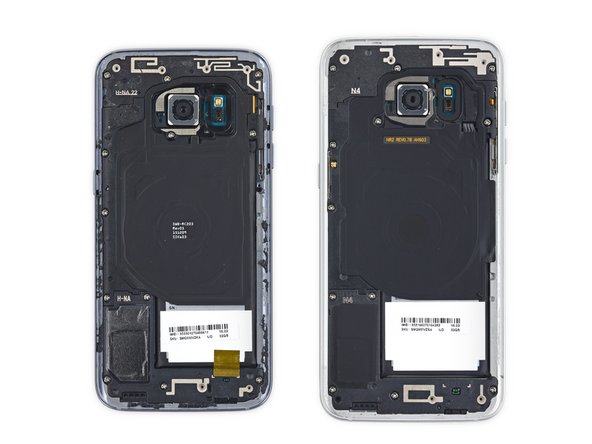
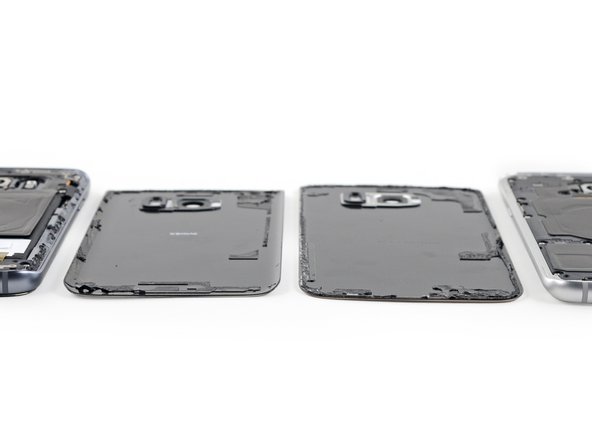
- S7 and S7 Edge side by side to compare and contrast: Heavy on the compare, light on the contrast.
- Inside, the two devices feature the same camera, flash, general construction, and even antenna positions (although those squiggles are slightly different).
- Despite the startlingly similar layout, the curve-boasting Edge is actually less curvy from behind than its standard counterpart.
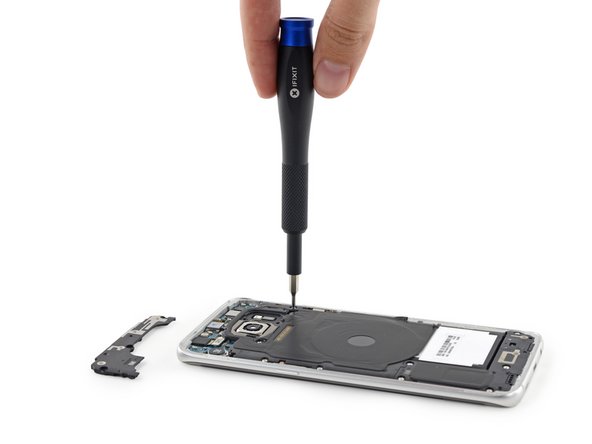
![Image 3/3: That's 20% more capacity than the already capacious [https://www.ifixit.com/Teardown/Samsung+Galaxy+S7+Teardown/56686#s122917|3,000 mAh battery in the S7]. It seems the tradeoff for a marginally thicker Edge will be longer battery life and less wear from frequent charging. Nice!](https://d3nevzfk7ii3be.cloudfront.net/igi/cfkB1lYYoxGyJVET.medium)
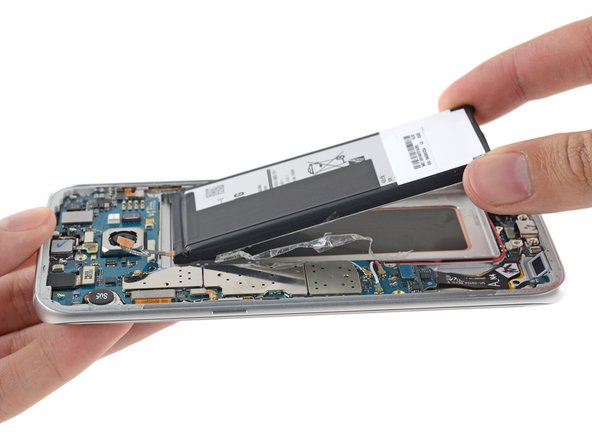
- Good news, everyone! The battery is no longer trapped under the motherboard, like it was on last season's Edge.
- We extract the whopping 3,600 mAh burner of a battery.
- That's 20% more capacity than the already capacious 3,000 mAh battery in the S7. It seems the tradeoff for a marginally thicker Edge will be longer battery life and less wear from frequent charging. Nice!
- By Grabthar's hammer, what a savings.

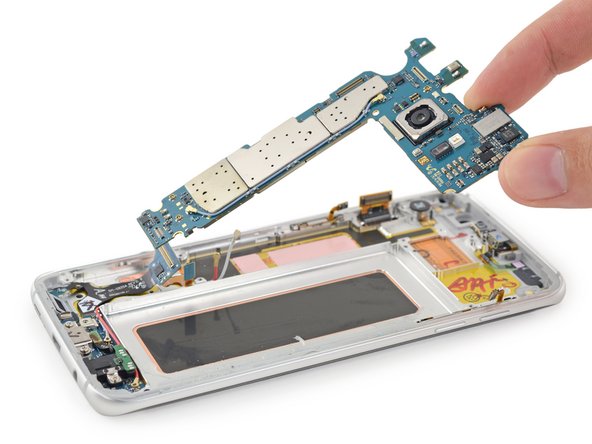
- We're deep in the belly of the curved-screen beast, but compared to its flat-faced sibling, everything looks... the same.
- Anyway, let's get that motherboard out.
![Image 1/1: SK Hynix [https://www.skhynix.com/static/filedata/fileDownload.do?seq=280|H9KNNNCTUMU-BRNMH|new_window=true] 4 GB LPDDR4 SDRAM layered over the Qualcomm [https://www.qualcomm.com/products/snapdragon/processors/820|MSM8996|new_window=true] Snapdragon 820](https://d3nevzfk7ii3be.cloudfront.net/igi/XCaqDALQQXRVyoHT.medium)
- With that, it's time to digitally convey some chip ID. On the front side of the motherboard, we note:
- SK Hynix H9KNNNCTUMU-BRNMH 4 GB LPDDR4 SDRAM layered over the Qualcomm MSM8996 Snapdragon 820
- Samsung KLUBG4G1CE 32 GB MLC Universal Flash Storage 2.0
- Avago AFEM-9040 Multiband Multimode Module
- Murata FAJ15 Front End Module
- Qualcomm WCD9335 Audio Codec
- Maxim MAX77854 PMIC and MAX98506BEWV audio amplifier
- With so many similarities to the standard S7's chipset, it almost feels like we're repeating the computer:
- Murata KM5D17074 Wi-Fi module
- NXP 67T05 NFC Controller
- IDT P9221 Wireless Power Reciever (likely an iteration of IDT P9220)
- Qualcomm PM8996 and PM8004 PMICs
- Qualcomm QFE3100 Envelope Tracker
- Samsung C3 image processor and Samsung S2MPB02 PMIC
- Oh, and one more thing.
- That whole "liquid cooling" thing? Not really that big of a deal. In case you missed it, we detailed our findings in our S7 teardown, and it's no different here.

- Samsung Galaxy S7 Edge Repairability Score: 3 out of 10 (10 is easiest to repair).
- Many components are modular and can be replaced independently.
- Unlike the S6 Edge, the battery can be removed without first ousting the motherboard—but tough adhesive and a glued-on rear panel make replacement more difficult than necessary.
- The display needs to be removed (and likely destroyed) if you want to replace the USB port.
- Front and back glass make for double the crackability, and strong adhesive on the rear glass makes it very difficult to gain entry into the device.
- Replacing the glass without destroying the display is probably impossible
![Image 1/3: Unfortunately, in a step backwards from last year's [https://www.ifixit.com/Teardown/Samsung+Galaxy+S6+Edge+Teardown/39158#s88415|model|new_window=true], this Edge has also adopted our ''least'' favorite design feature: soft-button LED cables that wrap around the midframe, to be glued down under the display glass. That daughterboard won't be coming out any time soon...](https://d3nevzfk7ii3be.cloudfront.net/igi/SsN4BfZSM2sLQ1VK.medium)

![Image 1/1: That whole "[http://www.techradar.com/us/news/phone-and-communications/mobile-phones/samsung-tipped-to-add-liquid-cooling-to-the-samsung-galaxy-s7-1310567|new_window=true|liquid cooling]" thing? Not really that big of a deal. In case you missed it, we detailed our findings in our [https://www.ifixit.com/Teardown/Samsung+Galaxy+S7+Teardown/56686#s122937|new_window=true|S7 teardown], and it's no different here.](https://d3nevzfk7ii3be.cloudfront.net/igi/CZDERTEJN3FQhjVl.medium)


